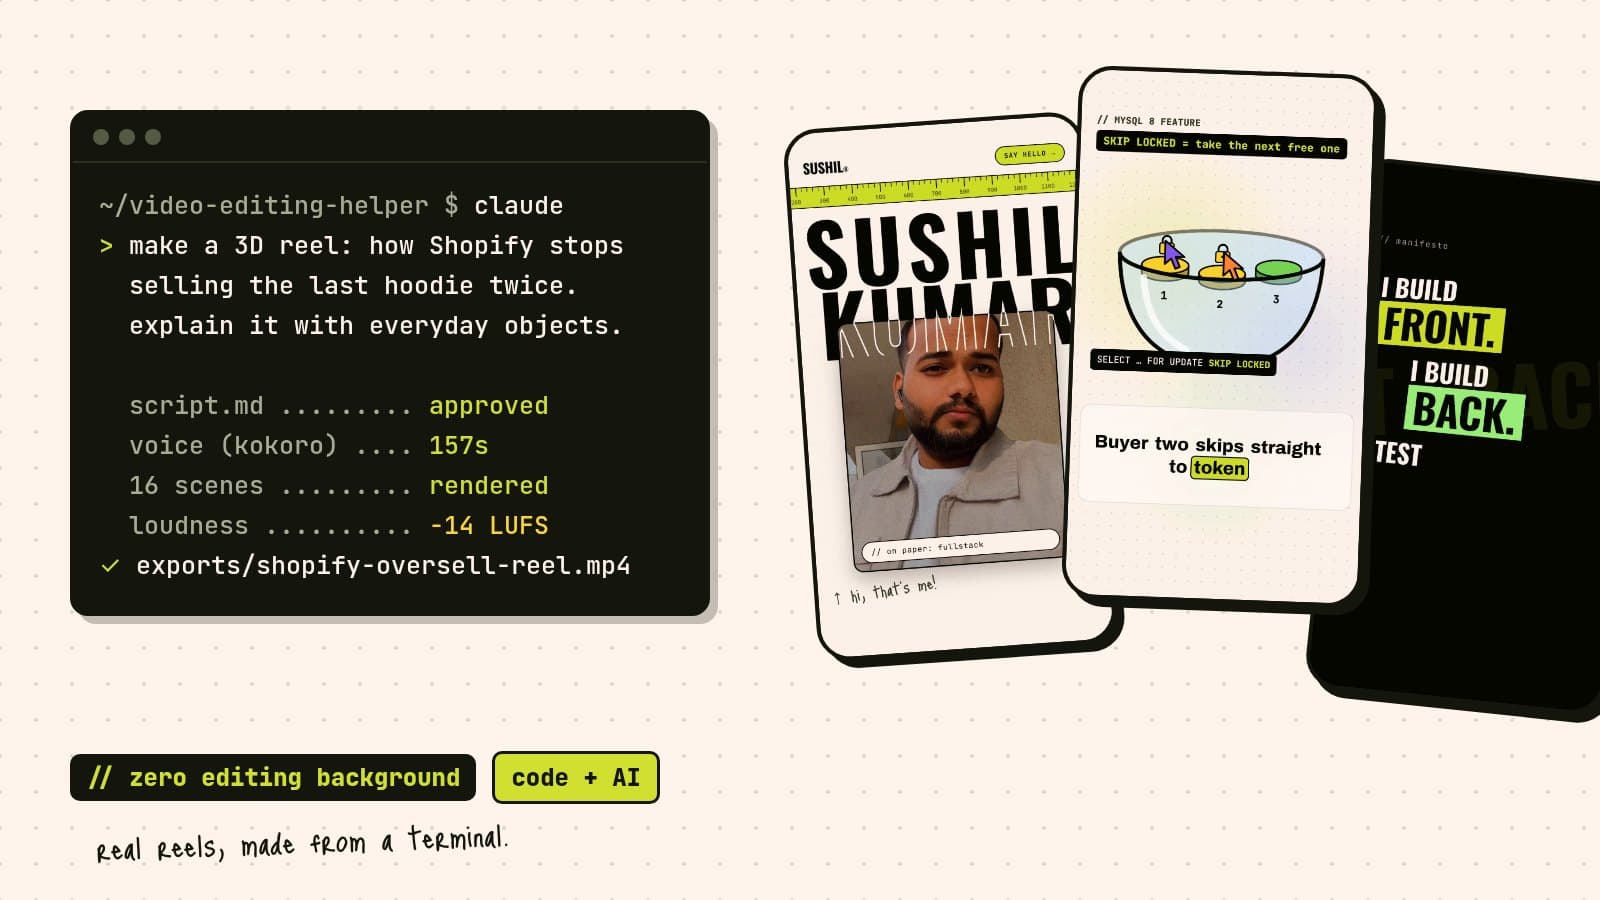
I've never opened Premiere or After Effects. I don't know what a keyframe panel looks like. Until a few days ago, "make a 3D motion graphics video" sounded like a skill that takes years.
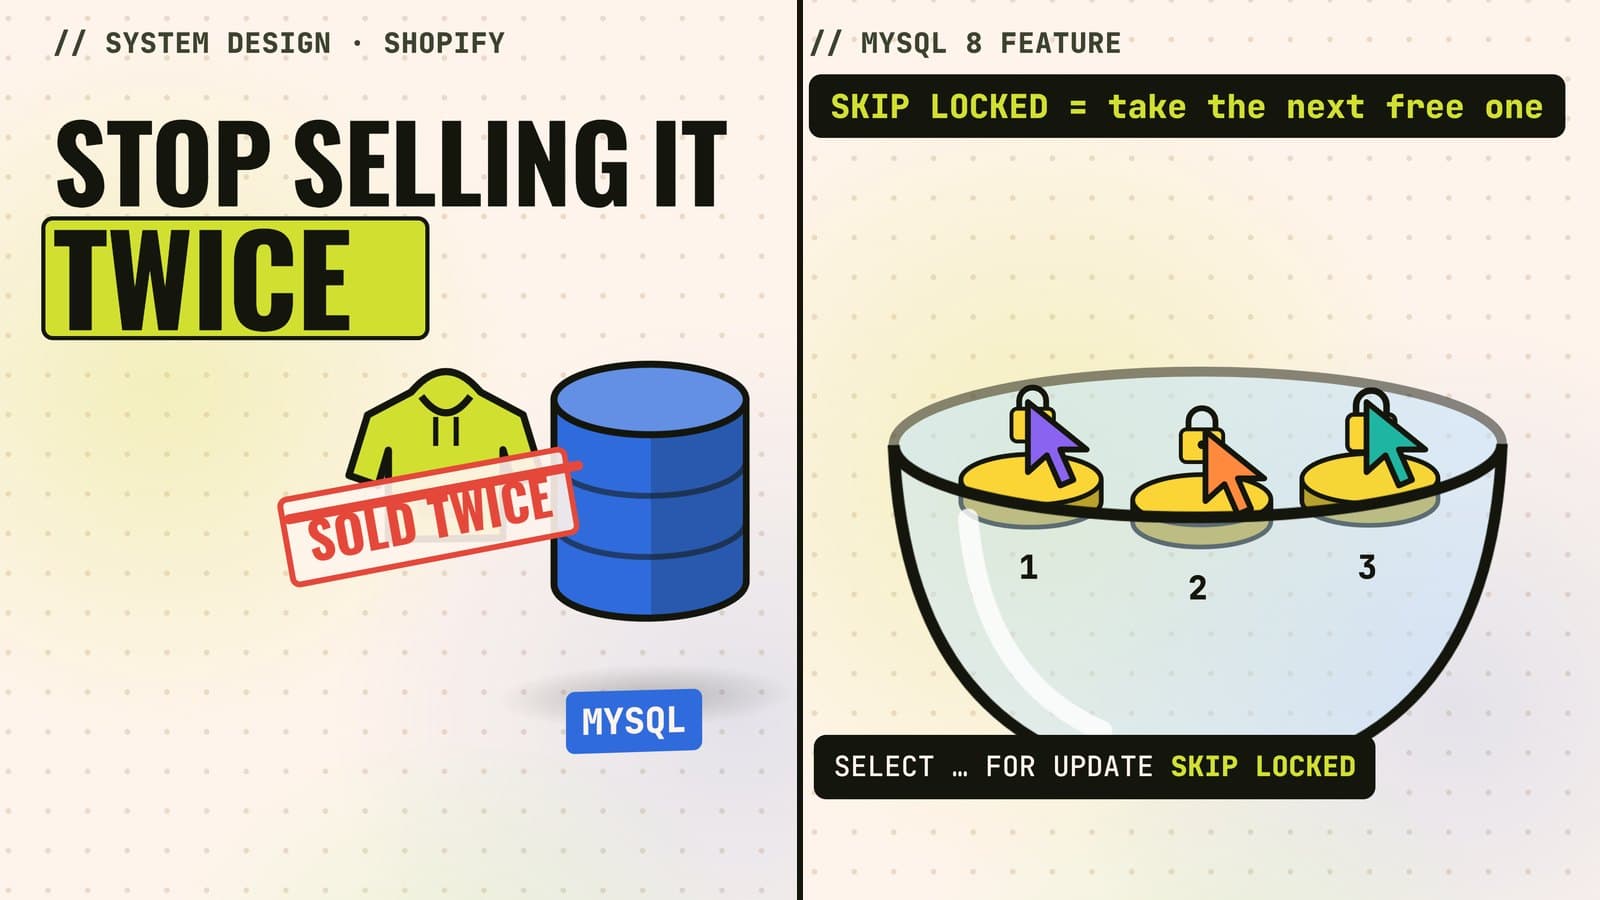
My first two videos are out anyway: a 27-second personal intro, and a two-and-a-half-minute 3D explainer on how Shopify stops selling the last hoodie twice. Neither was edited on a timeline. They came out of a folder on my laptop, written as code, and that's the part I want to explain, because I think it changes who gets to make this kind of content.
The honest starting point
What I don't have: any editing or animation experience, a microphone setup, or a designer.
What I do have: I write code every day, a laptop with an RTX 4050 (6 GB of video memory), and Claude Code, an AI coding agent that runs in my terminal. My bet was simple: if a video can be described in code, I can make it, the same way I build any other project.
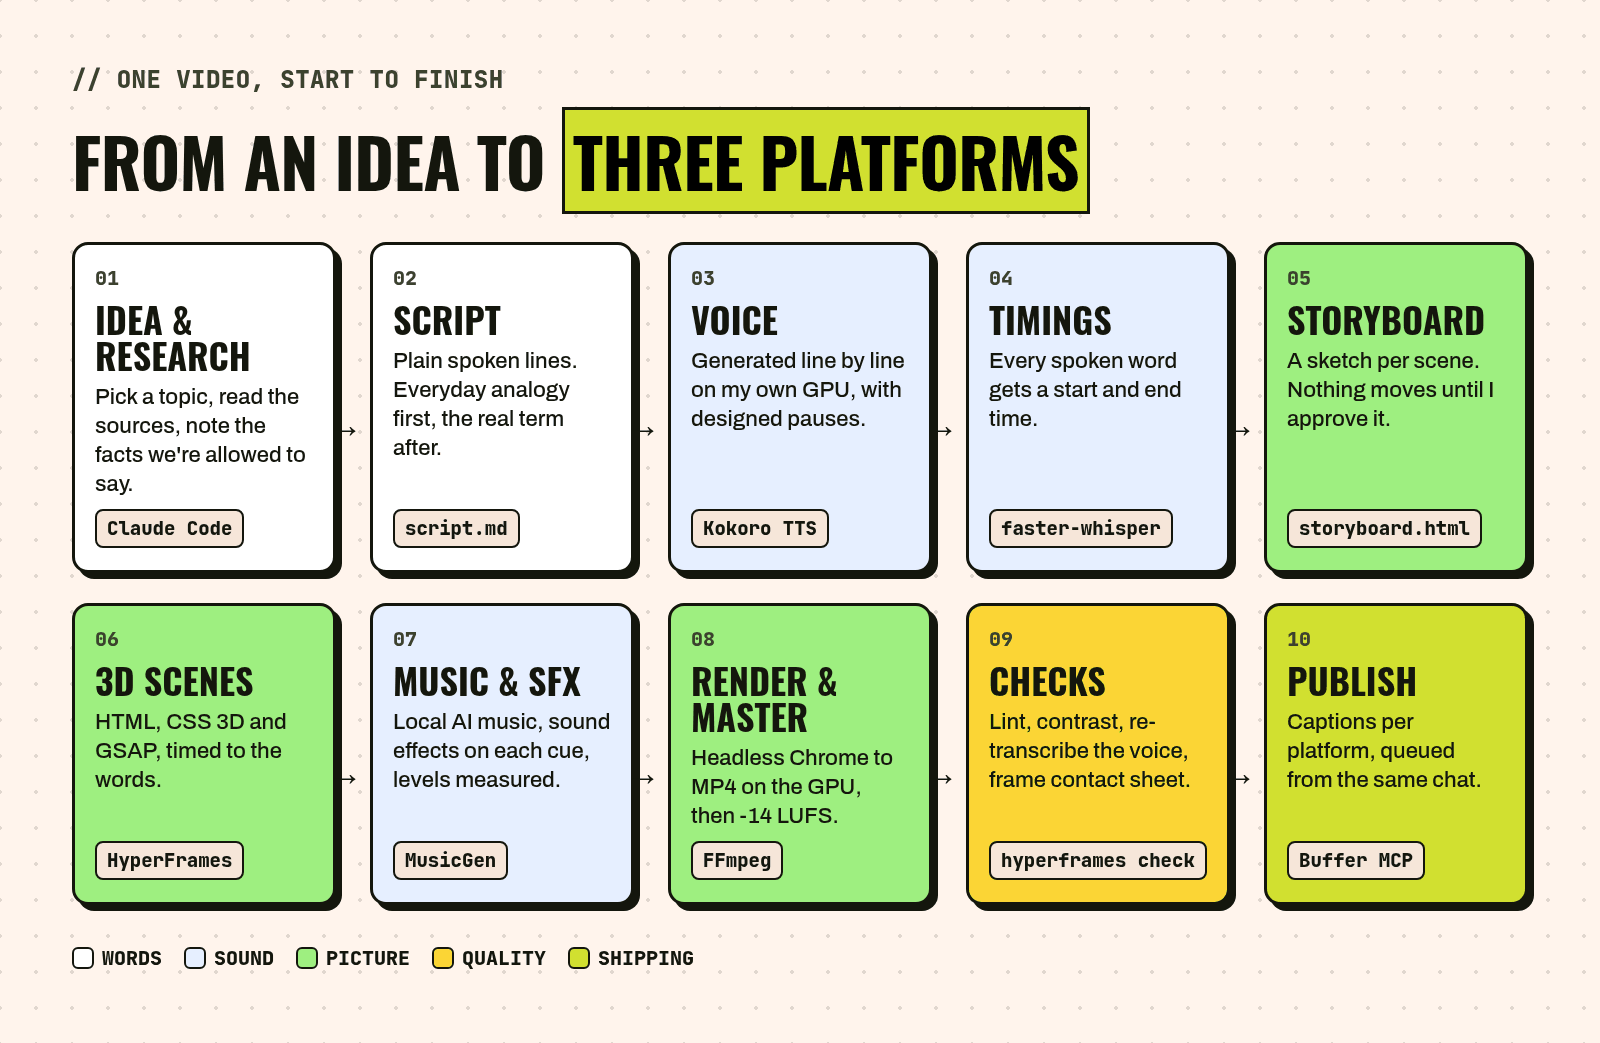
It turns out almost all of it can be. The scenes are web pages. The voice is a model. The timing is data. The sound mix is numbers.
The studio is a folder
Everything lives in one folder, video-editing-helper. There's no app to learn, just files that Claude Code and I both read.
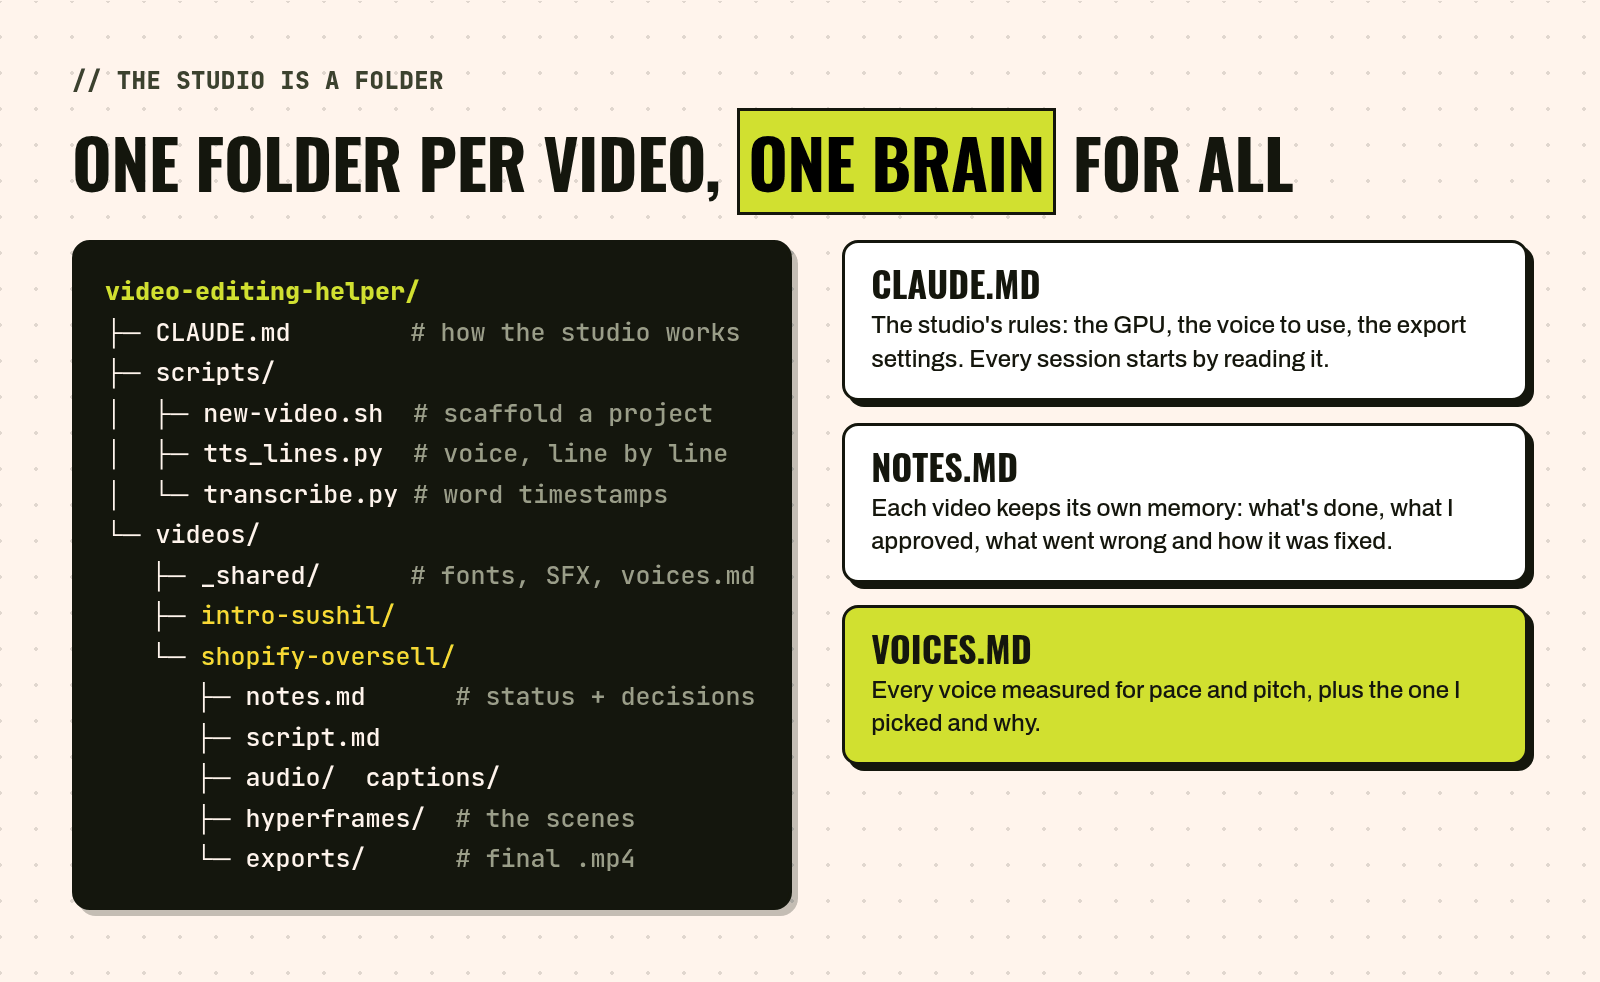
CLAUDE.md holds the studio's rules: which GPU, which voice by default, reels at 1080×1920 and 30 fps, final files as H.264 MP4 in
exports/.scripts/new-video.shscaffolds a new project with the same folders every time.notes.md in each video is its memory: what's done, what I approved, what broke and how it was fixed. The next session picks up exactly where the last one stopped.
Apart from Claude itself, everything runs locally on my laptop: the voice, the transcription, the music and the rendering.
Step 1: a script with stage directions
Each video starts as script.md. Plain lines are spoken. Lines that start with > are visual direction and never read out loud:
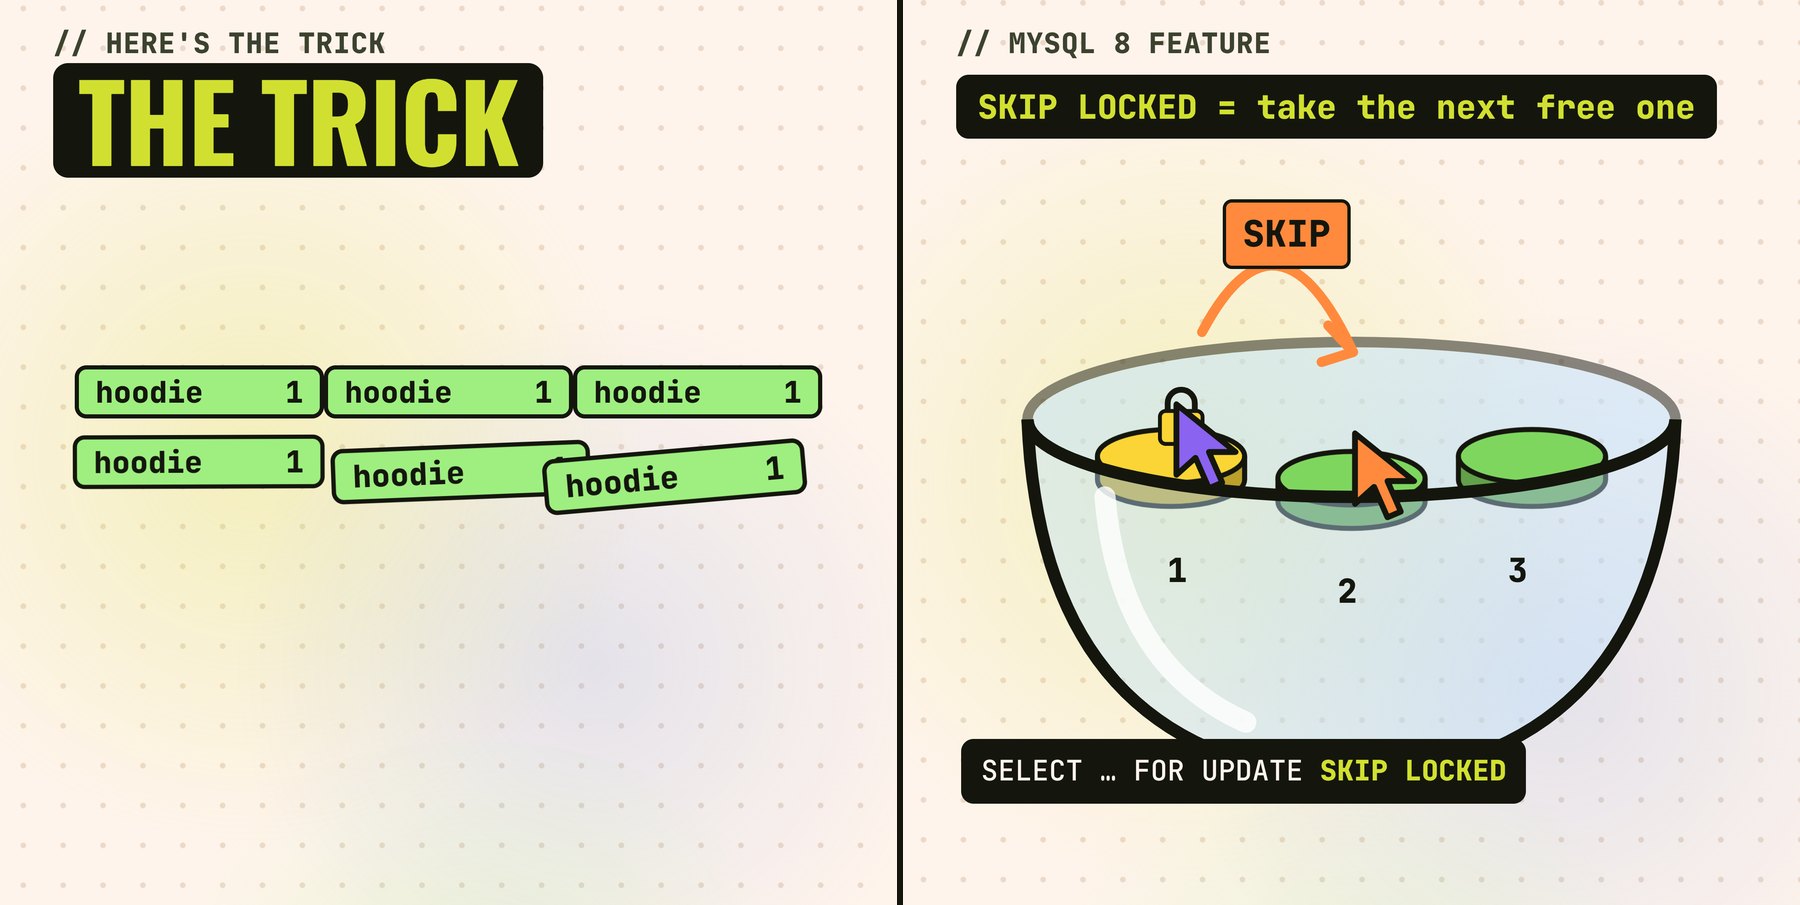
## 6. THE TRICK: TOKENS + SKIP LOCKED
> VISUAL: the single "6 left" row shatters into six 3D tokens in a glass bowl.
> ON SCREEN: "Before: 1 row that says 6  ->  After: 6 rows, one per hoodie"

And here's that trick. Instead of one row that says six,
make six rows, one for each hoodie. Like six tokens in a bowl.
The first version of the Shopify script lost anyone who wasn't already a developer. The rewrite follows one rule: show an everyday object first, then put its real name on screen. A notebook is a database, a bank transfer is a transaction, an "occupied" sign is a lock, and tokens in a bowl are rows. Claude drafts and rewrites; I approve the hook and the final wording.
Step 2: a voice without a microphone
The narration comes from Kokoro, a small open text-to-speech model that runs on my GPU in a few seconds. No studio, no retakes.
Picking the voice was the first real decision. Every voice was measured for pace (words per minute) and pitch, and the numbers went into voices.md. The first one I heard sounded too light for me, so the final voice is a blend of two: Kokoro can average voices, and am_michael plus am_onyx came out deeper and steadier than either alone.
The voice is generated one line at a time, with pauses I design instead of pauses the model guesses. Each line's start and end time is saved, so scene cuts can land exactly on a sentence:
# scripts/tts_lines.py (core loop)
for i, line in enumerate(lines):
    audio = np.concatenate([c for _, _, c in pipe(line, voice="am_michael,am_onyx", speed=a.speed)])
    nz = np.where(np.abs(audio) > 0.01)[0]            # trim the model's own silence
    audio = audio[max(0, nz[0] - 240): nz[-1] + 1200]
    meta.append({"text": line, "start": round(t, 3), "end": round(t + len(audio) / SR, 3)})
    t += len(audio) / SR + a.gap                       # then a pause I chose
Kokoro said "Riddies". the script says "Red iss".
Small fixes like that respelling live in the script, and the captions still show the right word.
Step 3: every word gets a timestamp
Next, faster-whisper (a speech-recognition model, also on the GPU) listens to the finished voice and returns every word with its start and end time. That does two jobs:
A pronunciation check. If the transcript doesn't match the script, the voice said something wrong. One voice turned "picked" into "pick"; this is how it got caught.
The clock for everything else. Captions highlight the word being spoken, and animations start on the word they illustrate.
The caption text comes from the script, not the transcript, lined up against Whisper's timings with Python's difflib. So the screen says "Redis" and "$5.1 million" even though the voice said "Red iss" and "five point one million dollars".
Step 4: a storyboard before anything moves
Before a single animation, Claude draws a storyboard: one static sketch per scene, with the line it belongs to and how it hands over to the next. I approve the sheet, and only then does anything get animated.
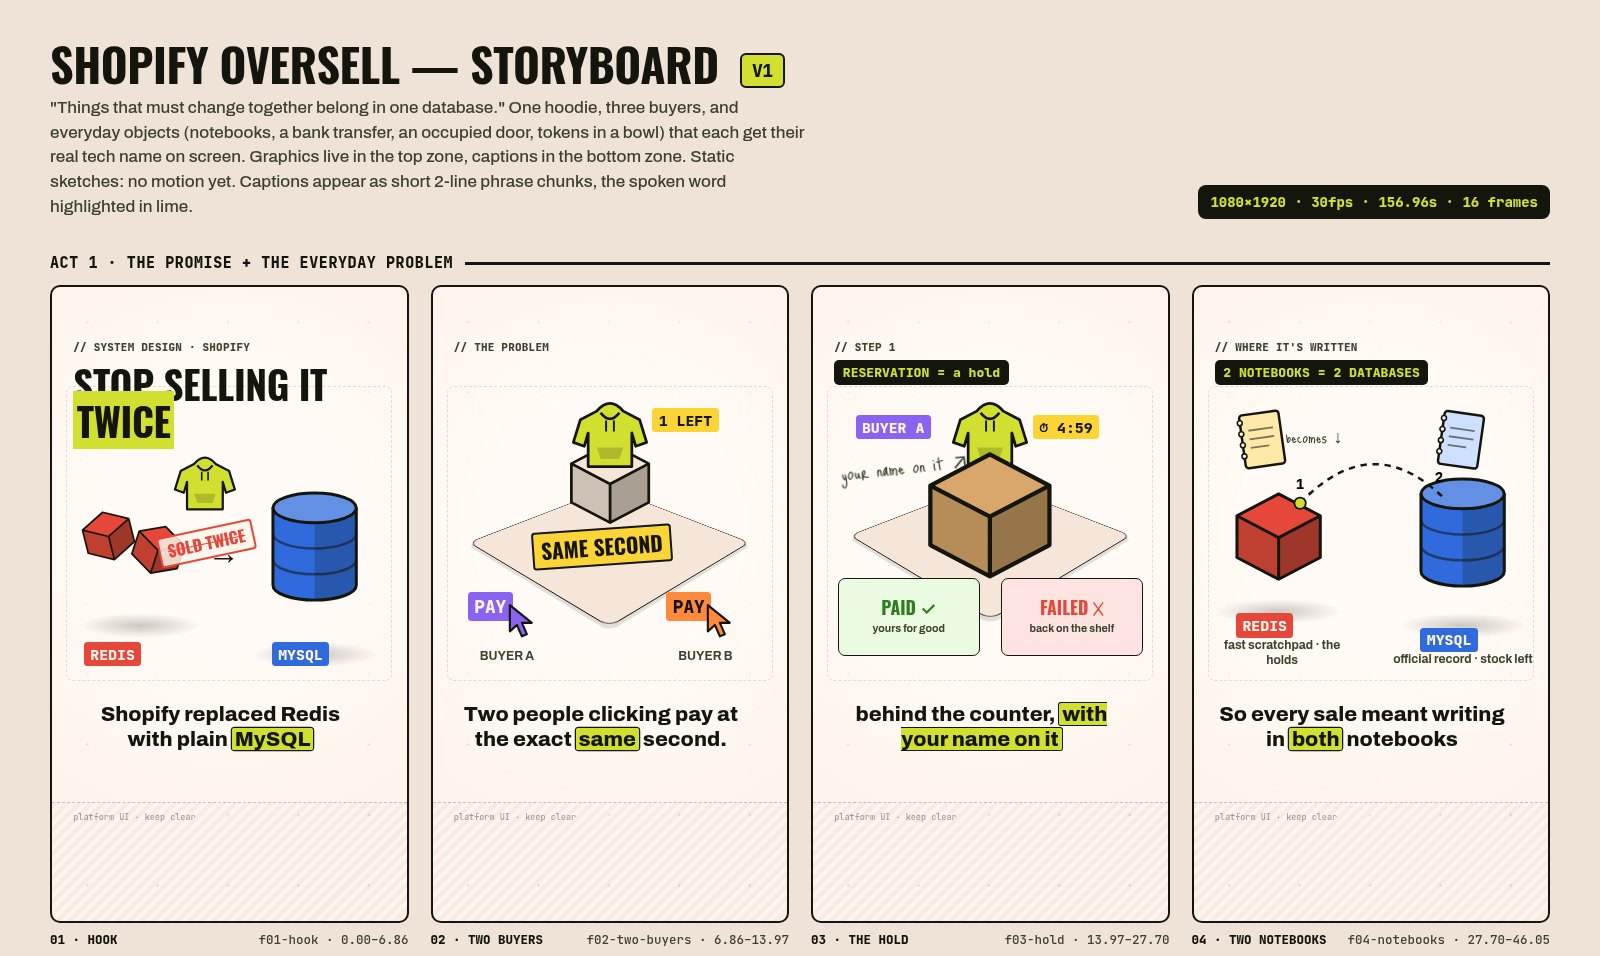
A design.md sits next to it, like a mini design system for the video. It sets the colours (each idea keeps one colour for the whole film: Redis is always coral, MySQL always blue), the fonts from this site, and the safe zones. Instagram puts buttons on the bottom 360 pixels and the right 130, so no text goes there.
Step 5: the 3D scenes are web pages
This is the part that would have taken me years to learn by hand. The scenes are built with HyperFrames, HeyGen's tool for making video from HTML: each scene is a web page with a GSAP animation timeline, and HyperFrames renders it frame by frame in headless Chrome, straight to MP4 on the GPU.
The "3D" is real CSS 3D: a cube is six faces in a preserve-3d container, a database is a cylinder of stacked discs, and the camera is a slow perspective drift so no frame is ever frozen. I didn't have to learn a 3D package, because it's the same CSS I write for websites.
Scenes don't contain hard-coded times. They contain the words they react to:
// tools/scenes/f12-skip-locked.html: the term pill appears when the voice says it
const ts = {{t:called skip locked}};
tl.fromTo($("pill"), { scaleX: 0, opacity: 0 }, { scaleX: 1, opacity: 1, duration: 0.35, ease: "power3.out" }, ts);
tl.fromTo($("sql"), { opacity: 0, y: 40 }, { opacity: 1, y: 0, duration: 0.4, ease: "power3.out" }, ts + 0.3);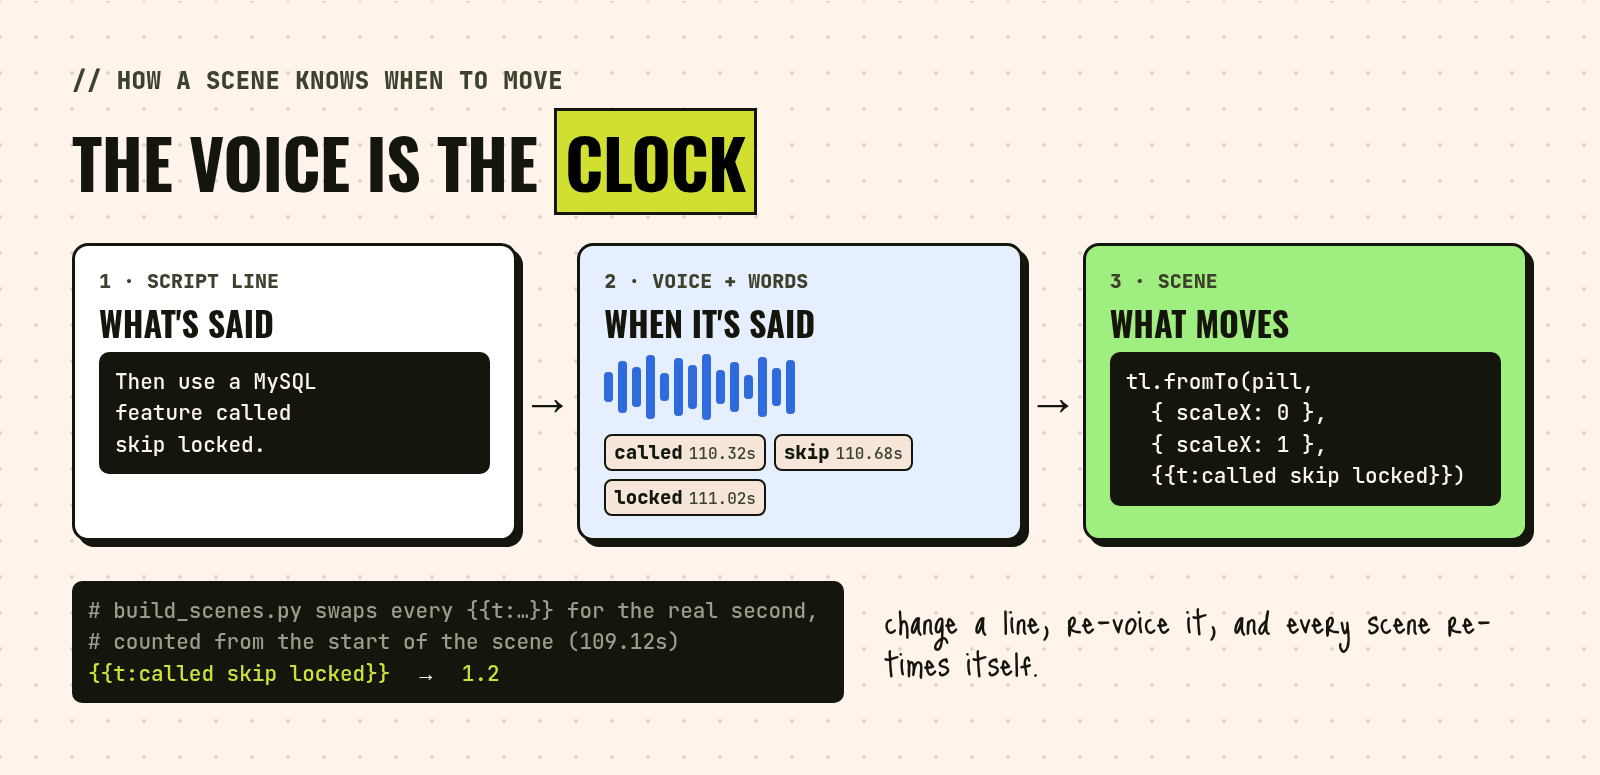
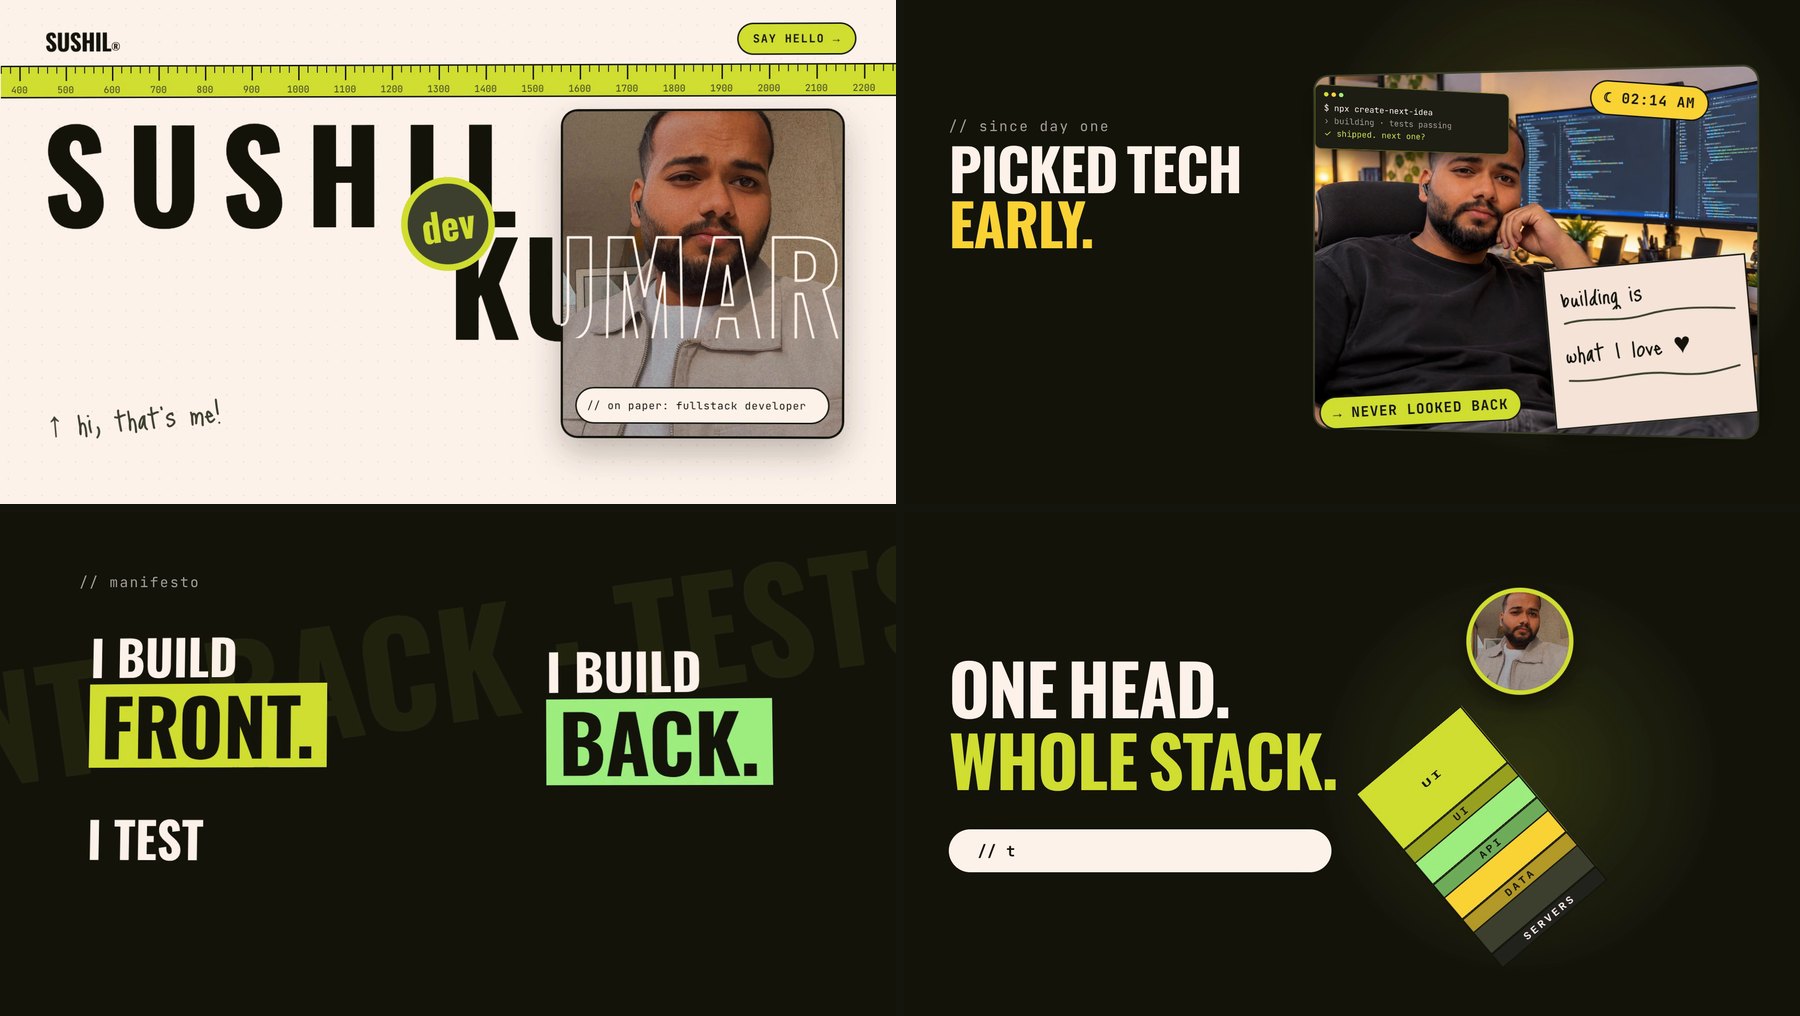
The intro used the same approach with a different job: it's about me, so it uses my photos and this site's look. The same compositions render in both 9:16 for reels and 16:9 for YouTube, because each scene adapts its layout to the frame width. I made three alternative scripts too, and all four versions rendered in both sizes.
Step 6: sound, by the numbers
Sound is where I expected to fail, because I can't hear a mix the way an editor can. So it's done with measurements instead of ears:
Music is generated locally with MusicGen, a music model, and looped under the voice at a steady low level.
Sound effects: the Shopify video has 68 cues (pops, whooshes, impacts), each set from its measured loudness rather than by guessing.
Loudness: the voice is normalised to -16 LUFS, and the final master to -14 LUFS with peaks under -1 dB, which is about where Instagram and YouTube expect it.
The delivered Shopify reel is H.264 at 1080×1920 and 30 fps, with AAC audio at 256 kbps and the index at the front so it starts playing straight away.
Step 7: checks before anyone sees it
A video can't be unit-tested, but it can be checked:
hyperframes checklints every scene and measures text contrast. The Shopify reel passed with 0 errors and all 46 text checks.Contact sheets: frames from every scene on one image, so a broken scene shows up at a glance.
Re-transcribing the final audio to make sure nothing got mangled in the mix.
Loudness over time, second by second, to find spikes like the one in the lessons below.
Step 8: one reel, three platforms
Each platform wants different words, so each gets its own copy, written into post-copy.md. Instagram gets the hook in the first line and five hashtags at most. X gets a short post and a thread. LinkedIn gets the longer version: the problem, the fix, and what I take from it. The cover image is also a web page, rendered to a 1080×1920 PNG.
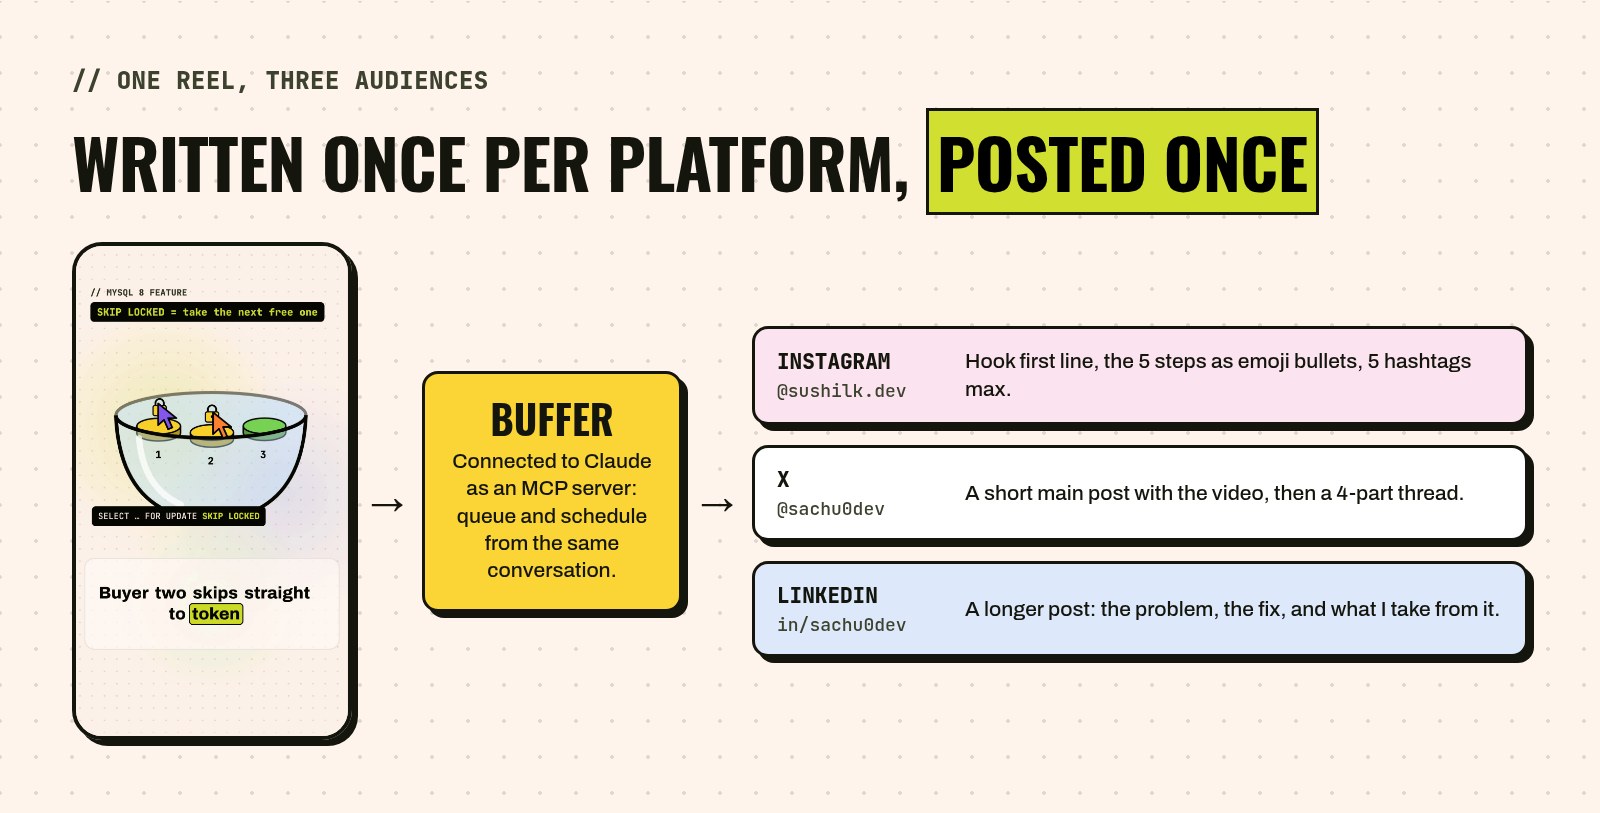
Posting goes through Buffer, connected to Claude as an MCP server (a plug-in that lets the agent use Buffer directly). The same conversation that made the video can queue it to Instagram, X and LinkedIn, with the right caption on each.
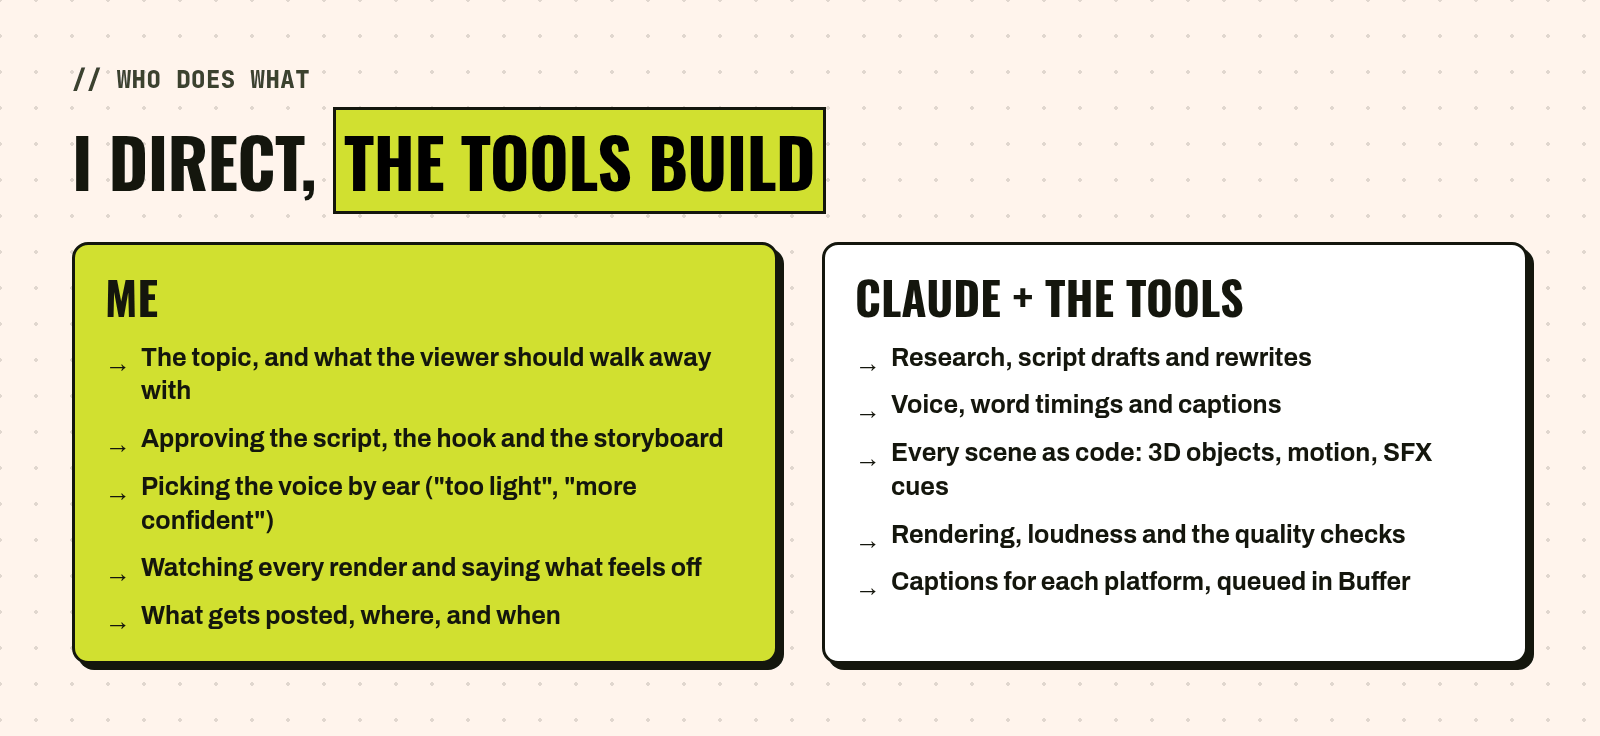
What I decide, what the tools do
This doesn't mean the AI makes the videos and I watch. It means I do the part that needs taste, and the tools do the part that needed years of practice.
Mistakes I only had to make once
Every one of these is written into a notes.md, so the next video starts already knowing them:
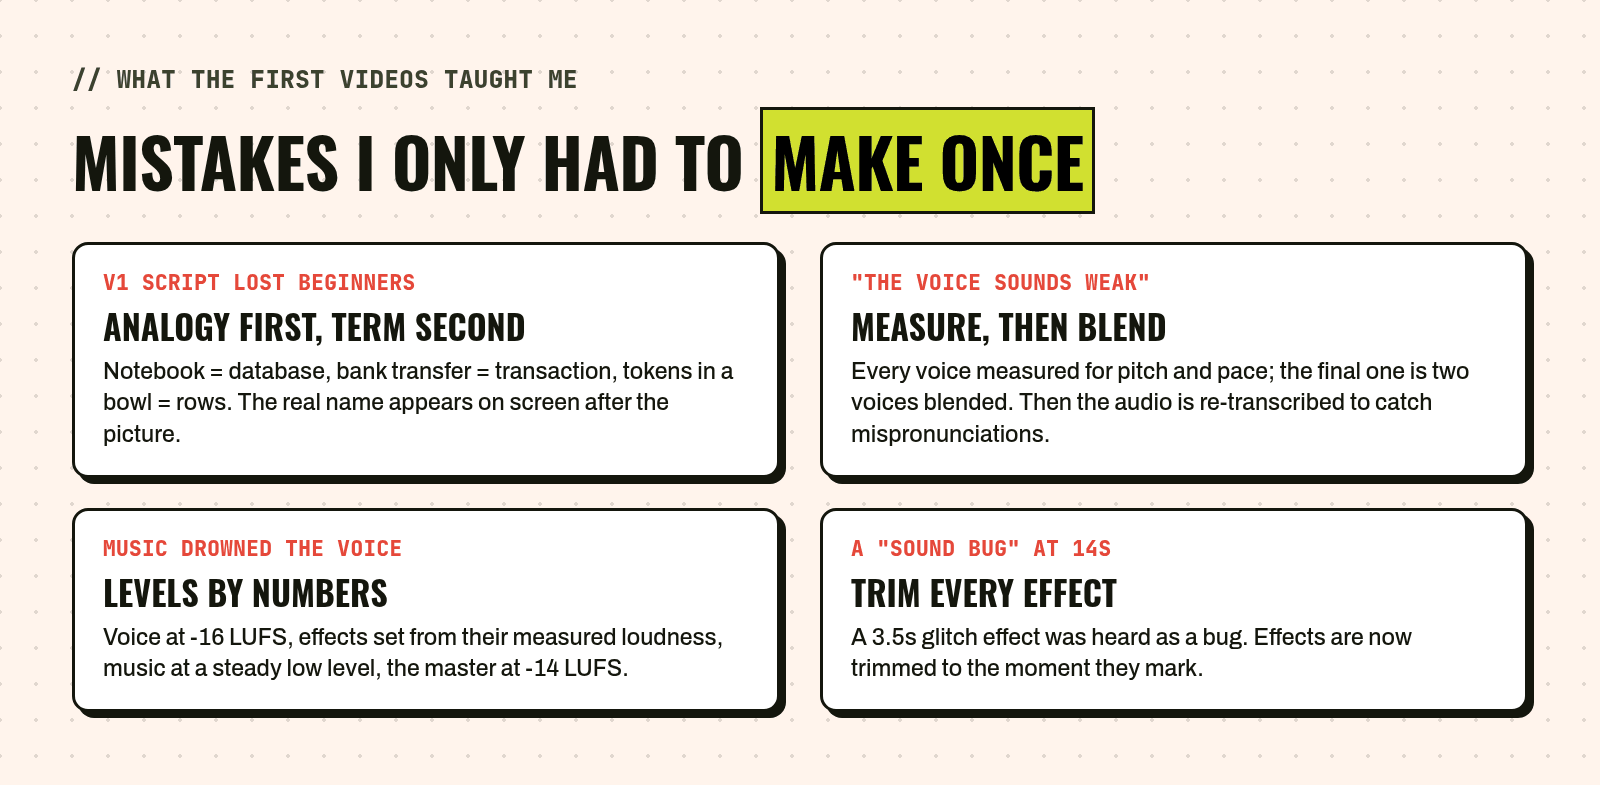
An automatic "duck the music under the voice" effect silenced the music completely in my renders, so it's a plain volume level now.
A preview tool rewrote my project template and broke the music settings, so the template now lives in its own file that the tool never touches.
A 3.5-second glitch sound, used as a quick accent, played for its whole length and sounded like a bug. Effects get trimmed to the moment they mark.
What this means to me
Motion design, voice work and sound mixing are real crafts, and the people who are great at them are still far ahead of what I do. But the gap between "I have an idea for a video" and "it's posted" has become something a developer can close in days, not years. The skills that got me here are the ones I already use at work: break the problem into steps, write each one down, automate it, and check the output.
It's early: two videos, one studio that's days old, and a lot to learn. If you want to follow how it goes, or tell me which system I should explain next:
Instagram: @sushilk.dev, where the reels go first
X: @sachu0dev
LinkedIn: in/sachu0dev
GitHub: sachu0dev
next video: you pick the system.